How to Setup Okta Provisioning
The Provisioning capability is only available for customers on the Enterprise subscription. Check out the Unleash plans for details.
Unleash Configuration
Step 1: Navigate to Provisioning configuration
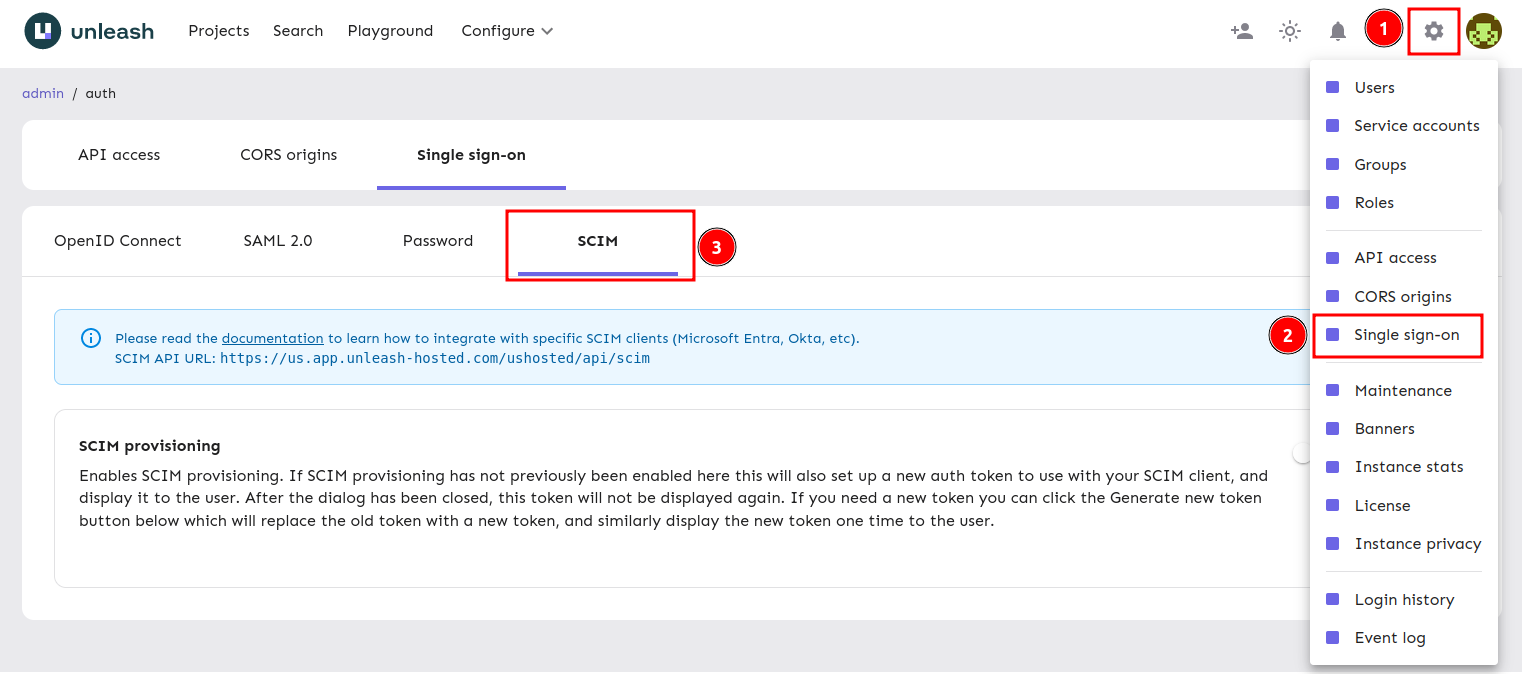
First you'll need to log in to Unleash as an admin user. Navigate to the Single Sign-On section and select the "SCIM" tab. The SCIM API URL will be shown in this section, you'll need this to configure Okta later.
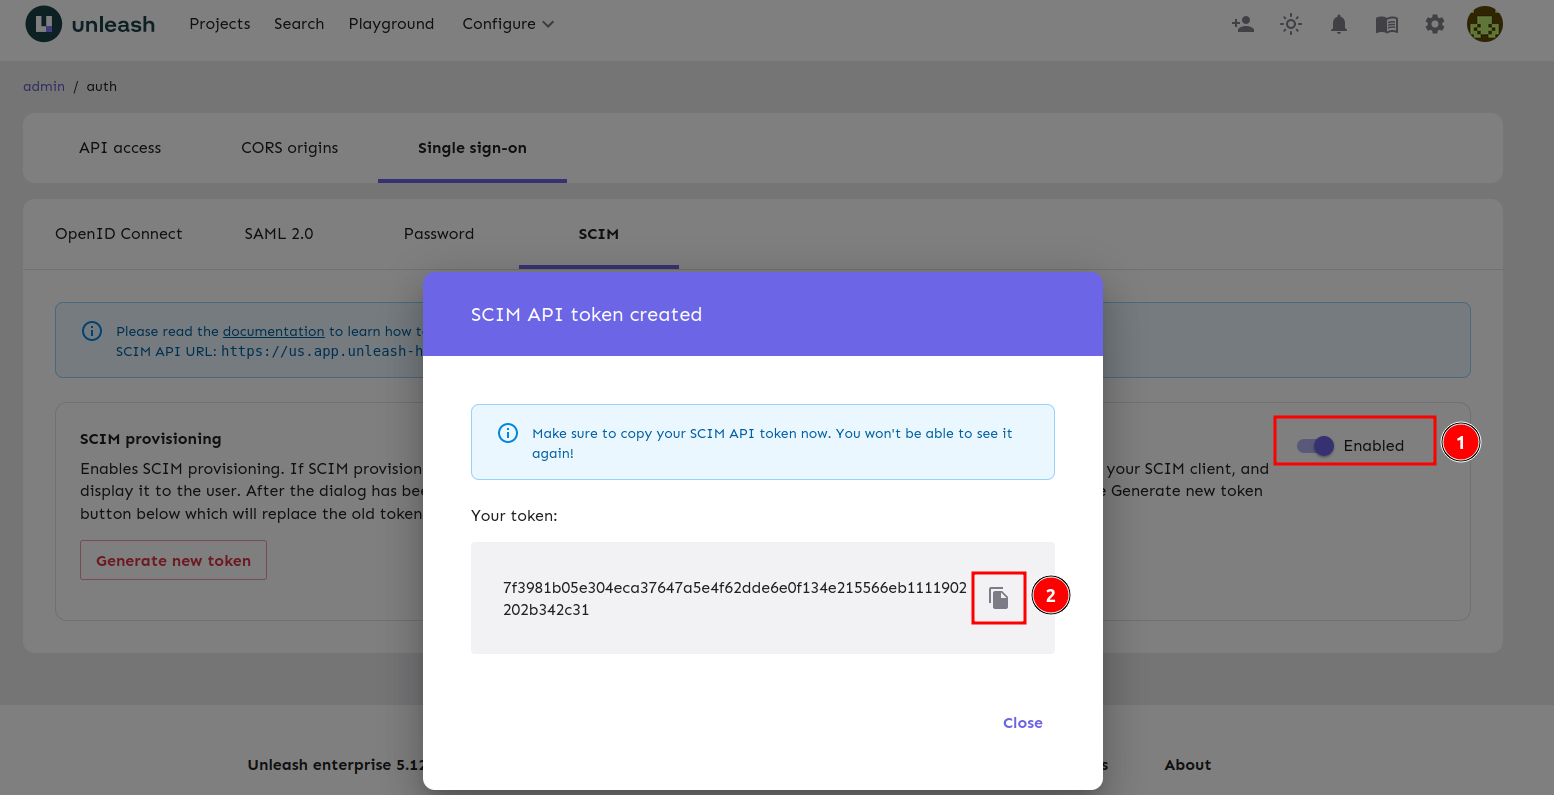
Step 2: Enable Provisioning
Enable SCIM by turning on the toggle and keep the token Unleash provides you for the Okta setup below.
Okta Configuration
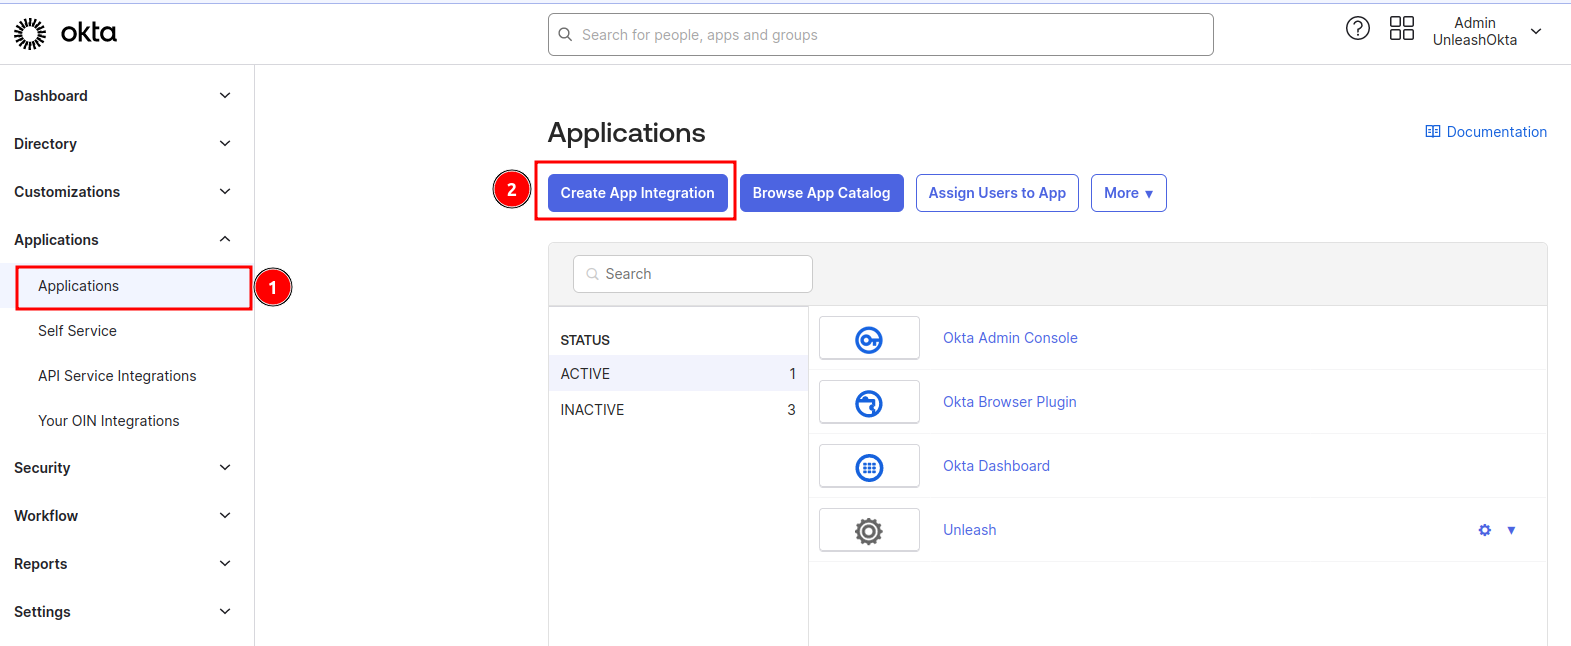
Step 1: Create an Application in Okta
If you already have SAML SSO configured for Unleash in Okta you can skip to the next step. If you're planning on using SAML for Unleash, do that first and skip to the next step. Note that if you're using OIDC SSO in Okta you still need to do this step.
This step will create an empty Sign-On Application that will only be used for SCIM.
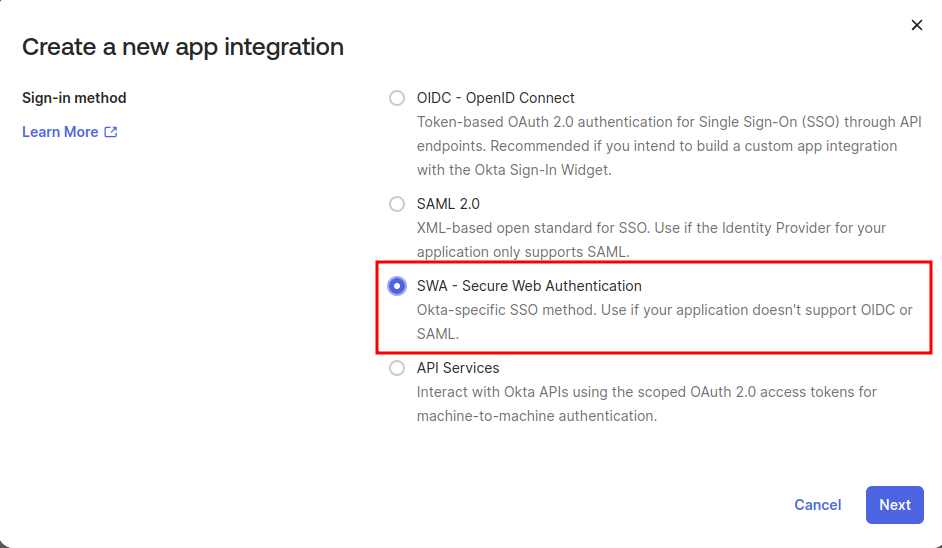
1) Navigate to "Admin -> Applications" and click the "Create App Integration" button.
2) Select SWA - Secure Web Authentication
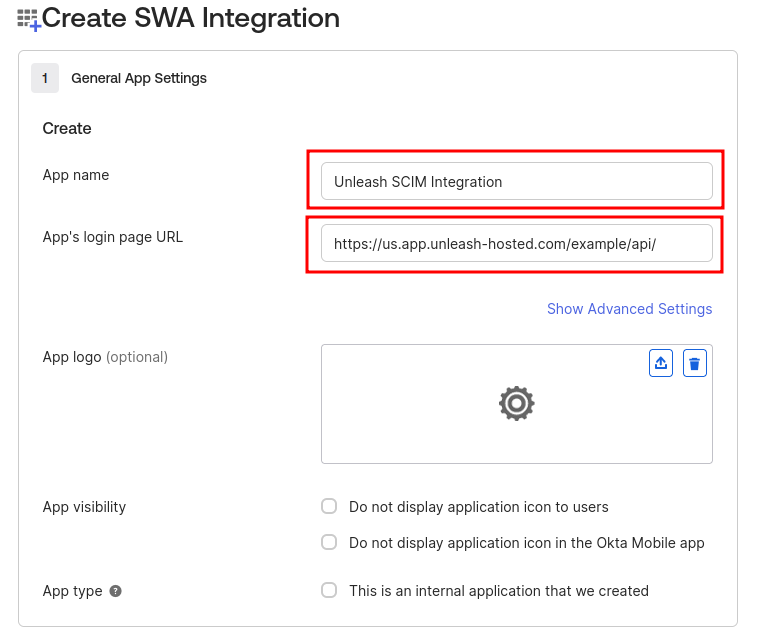
3) Fill in your App Name and App's login page URL
Step 2: Enable Provisioning in your Okta Application
If you already have a SAML application setup for Unleash you'll be modifying that application in this step.
Enable SCIM provisioning and save.
Step 3: Connect Unleash
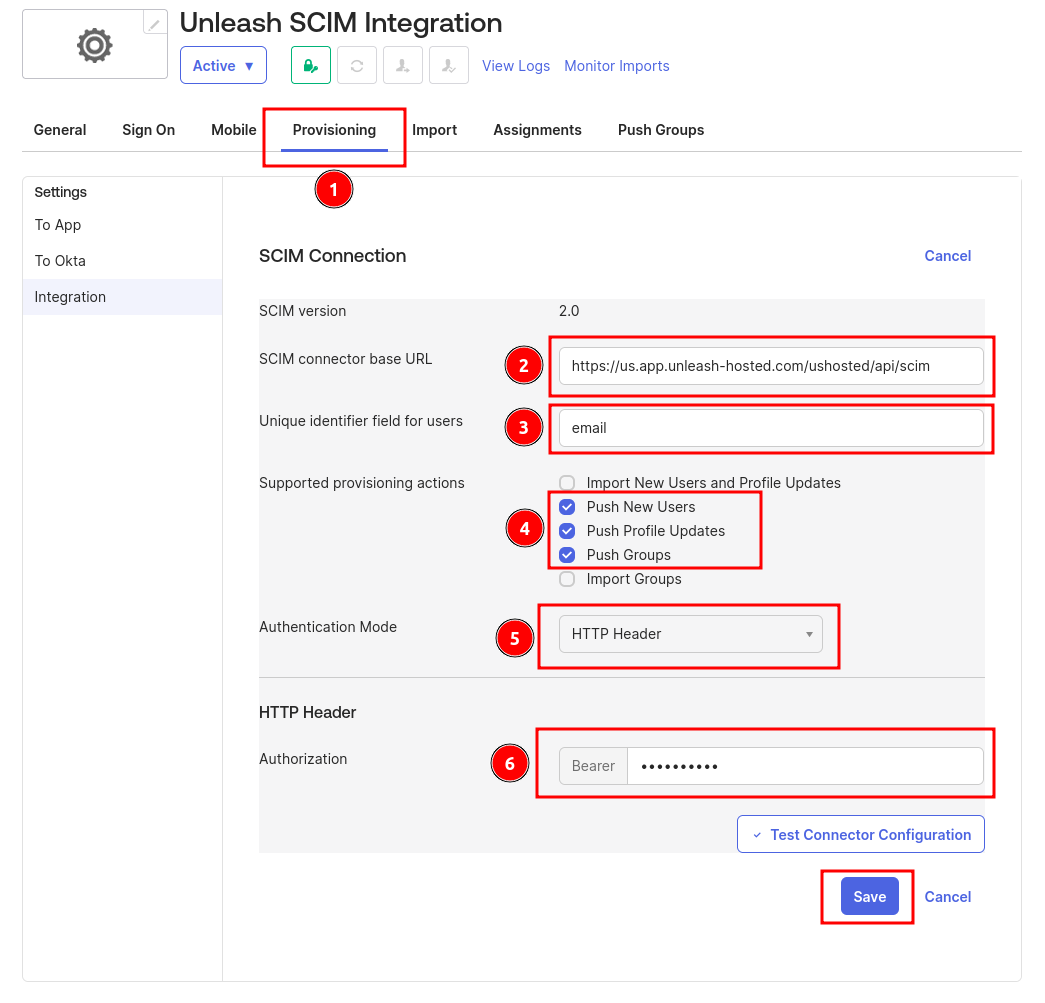
1) Navigate to the Provisioning tab
2) Set the Unleash SCIM URL
This is provided by the Unleash UI in the configuring Unleash section.
2) Set email as the unique identifier
3) Configure actions
Turn on "Push New Users", "Push Groups" and "Push Profile Updates".
4) Set authentication mode to "HTTP Header"
5) Add your SCIM token
This was provided by the Unleash UI in the configuring Unleash section.
Step 4: Configure Okta Provisioning
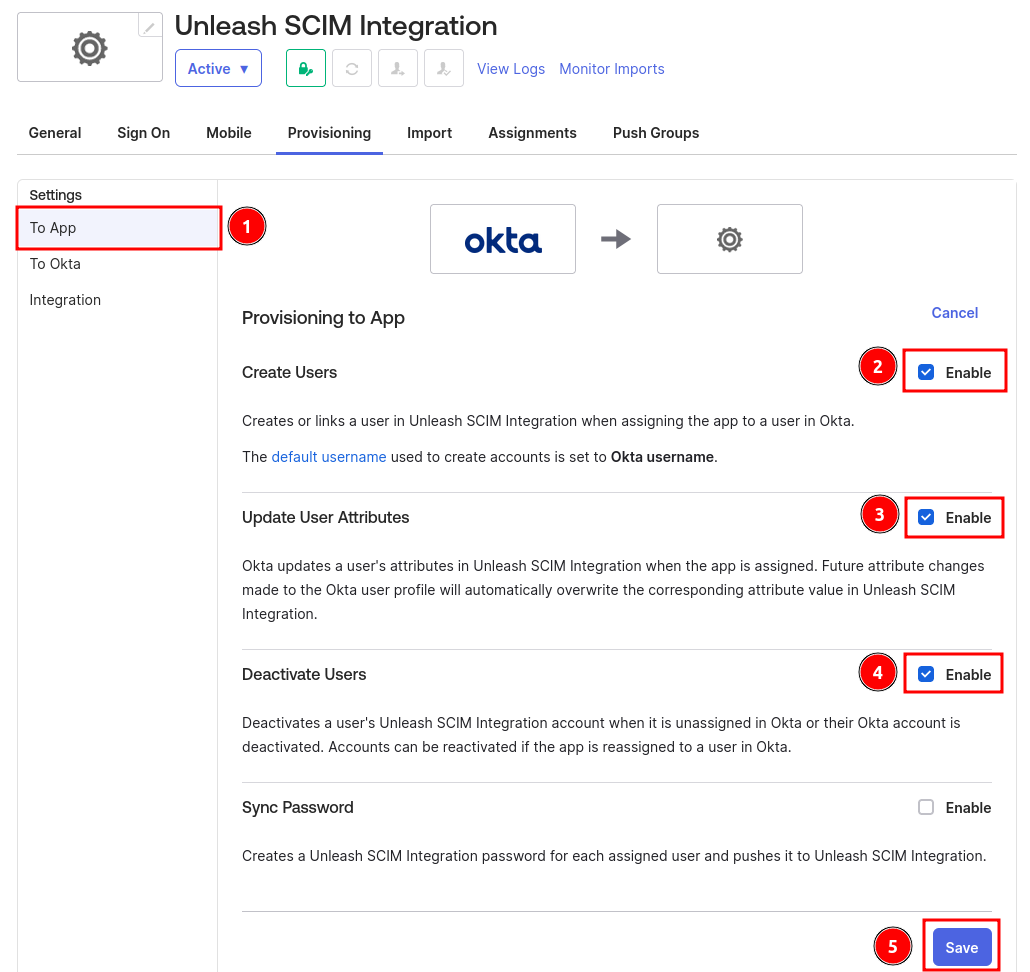
Navigate to the "To App" tab. Turn on "Create Users", "Update User Attributes" and "Deactivate Users". Save your configuration.
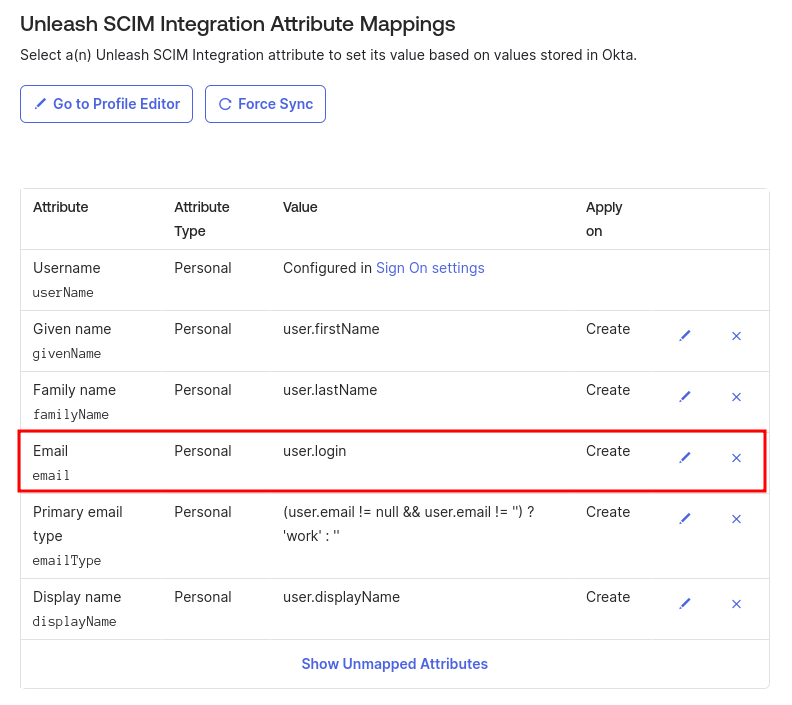
Step 5: Configure Provisioning Properties
1) Set email
Set the email field to map to your login property. This is important and ensures that your SSO integration continues to work.
2) Remove unneeded properties
You should remove all unnecessary properties. This ensures that Okta will reach a steady state when synchronizing. The properties that you must retain are:
- Username
- Given name
- Family name
- Primary email type
- Display name